CLICK HERE FOR FREE BLOGGER TEMPLATES, LINK BUTTONS AND MORE! »
Showing posts with label MPS: Family and Friends. Show all posts

Sunday, October 9, 2011

My Craft Spot Design Team Submission: Mini Book

Kimberly at My Craft Spot is having a Design Team call. I was so inspired I couldn't wait to get started. For my project, I made a mini book. I had so much fun creating this project. I just purchased a new Martha Stewart punch, Doily Lace, because I had this tri-fold card design in mind. A confession? This project started off as a card, but then I decided to use a new technique I just learned on creating a mini book with glue as the binding; no binding machine necessary. I couldn't wait to try it and this was a perfect opportunity.

I popped up the title on the book to give it extra dimension.

For the pages, you start by scoring the patterned paper the same spot as your book, in this case, at 4.25". You adhere the first page down and then adhere each additional page to the previous. That is how the binding is made. You can view an awesome video on this technique by Heidi Swapp here on My Craft Channel. That bright circle on the top right is actually a flower cut from glittered patterned paper with an epoxy sticker over it.

You can see the epoxy sticker effect better in this picture. I created a pocket on the bottom and stuck a tag in there that can be used for journaling or a small photo.
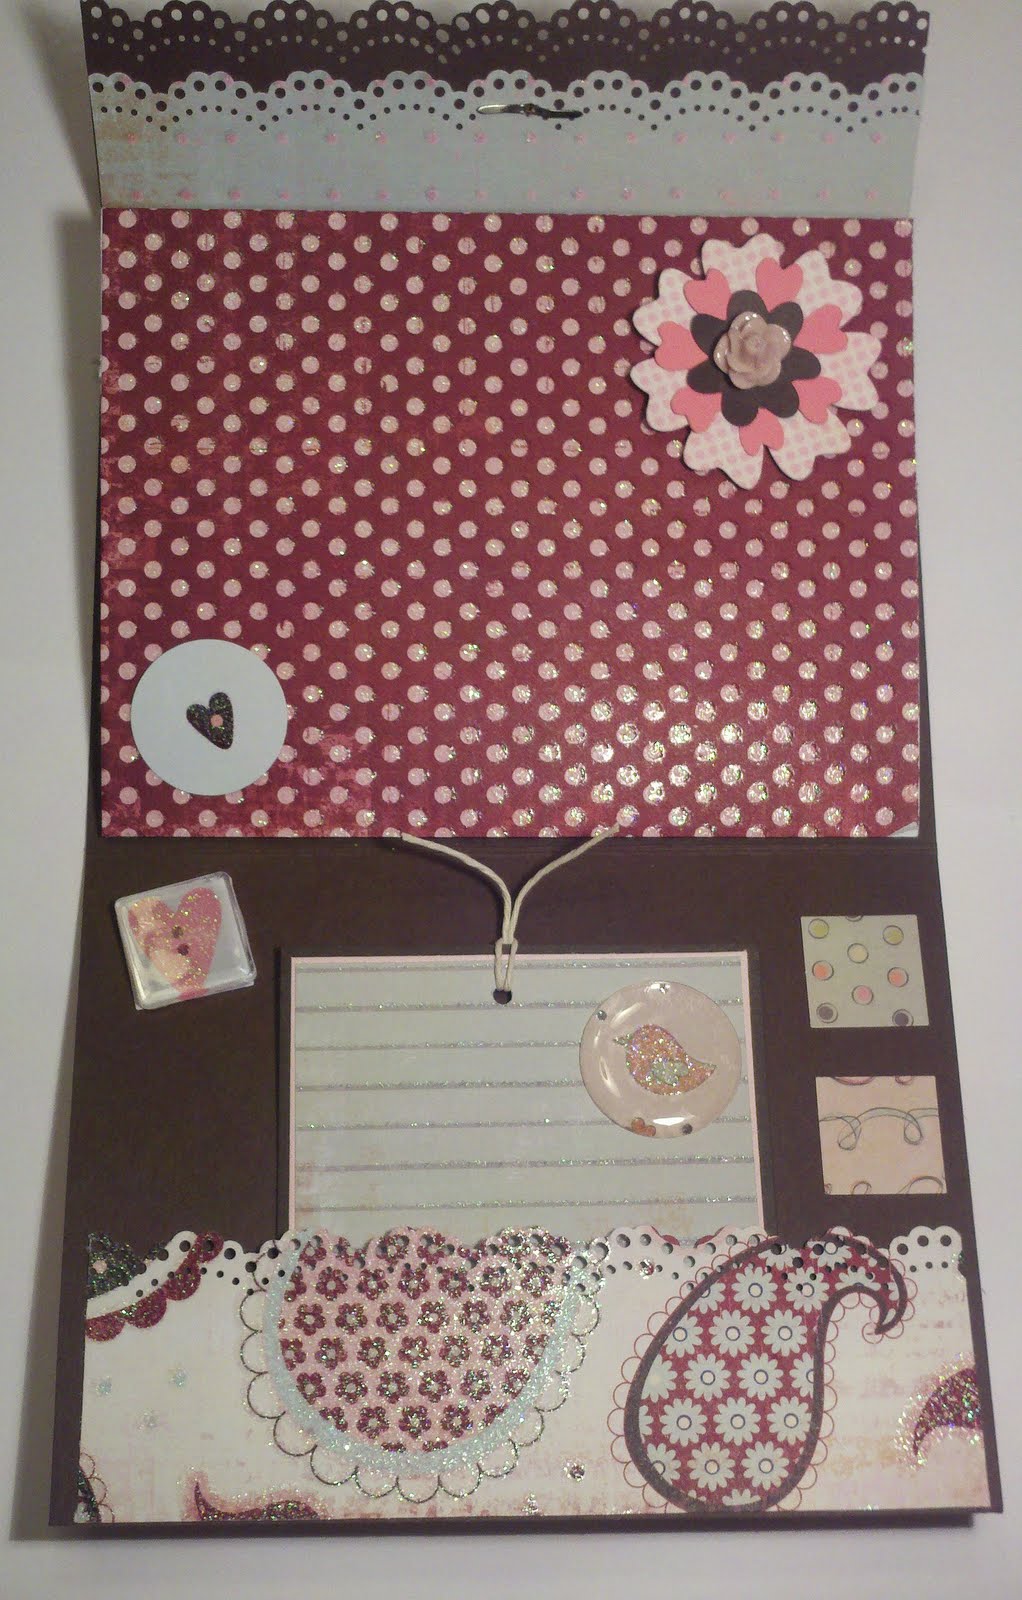

I left the middle page kind of plain because the paper is so graphic and I wanted to have it vacant for a larger photo.
I had so much fun creating this mini book, I will definitely be making more of these! Thanks for looking and come back soon.

Recipe:
  • Base at 5.5" x 10". Score at 4.25" and 8.5"
  • All paper from My Mind's Eye Lovenest and Spring Feast from First Edition
  • 1" circle punch and 3/4" square punch for the cover banner and base for facets and epoxy stickers
  • My Creative Time Anyday Bingo & Crossword for the letters on the cover
  • My Pink Stamper Stamps Family & Friends for the "memories" on the cover
  • Tim Holtz Facets
  • 1" Epoxy stickers
  • Brad on outside from Basic Grey Sweet Threads collection
  • Glossy Accents as adhesive for facets and epoxy stickers
  • Cricut Cartridge Kate's ABCs for the flower
  • Martha Stewart Doily Lace punch

Friday, September 30, 2011

Mini Album with Your Story Photo Personal Bookbinding Machine

I love this little machine. I purchased it from HSN and got a bunch of covers with it. Very inexpensive and it's still available here. It's so easy to put a little album or personalized little pad together - the possibilities are endless! Well, for this album, a dear friend recently lost her kitty and they were very good pals. :( I wanted to give her something that she could always have as a special keepsake and have it chock full of memories. I hope she likes it.

For the cover, I used small square tags but I can't remember which cartridge it's from :(. The font is Roly Poly from Plantin Schoolbook. I love that font and it, or the Gypsy font are usually my go-to fonts. Of course, I only have one or two other font cartridges anyway. LOL. Every other image is from the Meow cartridge. I roped some twine through the hole in the tags. The paw prints are from the Cricut Lite cartridge, Meow. I blinged up the cover with some gemstones.

Here's a view of the whole book.

And here are some individual pages:


I cut a 1/2 inch circle and wrapped it in twine to make it look like a ball of yarn that the cat is playing with. I did that on a few different pages also.

The last page are pockets that I made from envelopes. I glued two together to make the pockets. I put a blank piece of paper in one of the pockets so she could do some journaling. I stamped"memories" from My Pink Stamper stamp and the paw is from Mr. Cricut Crazy stamp set titled, Man's Best Friend Vol. 1.

Thanks for looking and have a great day!

Saturday, August 27, 2011

Your Story Personal Book and Cricut Imagine Pink Endcaps. Finally!

My Godson is turning 7 next week and I wanted to make him something special. I made a 5x7 journal/all-purpose book for him using my Your Story Photo Personal Bookbinding machine. I decorated the cover using the Cricut Imagine cartridge Imagine More. The font is from Plantin Shoolbook, but I filled it in with matching colors from the Imagine More cart. Using the Imagine on this project made it simple, rather than having to find pattern papers and lay them out on my mat and figure out sizing. I am really happy I used the Imagine for this project. I haven't used it in quite a while.
Speaking of the Imagine, today I finally received my pink end caps! I was SO excited. I ordered them 3 weeks ago and 2 hours later they were out of stock. I lucked out and LOVE the way it changes the whole look of the machine. It brightens it up and gives it style, which is nice because it's such a large part of my craft room.


For the embossing on this card, I used an embossing folder from The Paper Studio. I was nervous at first, figuring it wouldn't give a good impression, but I didn't even need a shim when I ran it through my Cuttlebug. I will definitely be purchasing more of these. Hobby Lobby had a bunch to choose from. I love that store. The boy is from the Cricut Lite cartridge, Playtime. The Happy Birthday sentiment is a My Pink Stamper set and his adorable face is Peachy Keen's Wide Eyed Kid face assortment. I used glossy accents on the eyes; I love that look.
Thanks for looking and have a great day!

Sunday, May 22, 2011

An Android Weekend


My sister lives in Pennsylvania and she came to see me this weekend. We are extremely fond of our Android cell phones. LOL. I just got one in April and she is very tech-y, so she's been helping me find my way around on my Droid X. We have spent hours on the phone just playing with our phones. It's hysterical. So, we talked about her driving here to visit so we can "Droid" together. It's a little over 5 hour drive. She decided to come this weekend and we played with our computer and phones all weekend. It was a blast and I am so grateful she drove so far and left her furbabies for the weekend to come visit. So, I made this card to send her as a thank you. Isn't it adorable?! The phone is from the Paisley cartridge. The sentiments are from My Pink Stamper stamps and the "numbers" are a variety of Papertrey Ink sets I have. I'm sure she'll get a kick out of this card.

I just realized I cut the antenna out of the picture. It's there on the top left. Oh well. You get the idea. :)

Wednesday, February 23, 2011

A few cards I've been working on


I haven't posted in a while. But I've been busy. Here are some cards I made. This first one is a variation on a card I made a few weeks ago. I just changed up the colors and patterned paper. I love this one; it's so bright and cheerful. And I got to use my Peachy Keen Happy Lashes set!! The sentiment is from My Creative Time's Color Me Happy set. Emma's stamps are so awesome and she just released 4 new sets this evening!


This next card showcases my new Meow cartridge and my favorite Peachy Keen set, Wide Eyed and Bushy Tailed. This set is perfect for the Meow cartridge!! That flower was dyed with SU! reinker in glorious green, my favorite SU color! The sentiment is from My Pink Stamper's set Family & Friends and the patterned paper is from a 6x6 pad from Basic Grey. I love those pads. The patterns are the perfect size for cards. I whipped out my sewing machine, well that's not true, it's always out, and zig zagged stitched around this card. That was fun. I really like this card.
Thanks for looking! Have a great day.

Monday, January 24, 2011

My Pink Stamper: Birthday Project Challenge


This was an easy challenge. It's Robyn's (My Pink Stamper's) birthday today: Happy Birthday, Robyn!! The challenge was to make a birthday project. It doesn't get much easier than that. I could always use an extra birthday card. For this card, I used Winter Frolic. For her jacket, I used DCWV Dots, Stripes & Plaids. Her fur trim is some ribbon I purchased from Target during Christmas. It matches my most favorite Stampin'Up! color ever...Glorious Green! I'm so sorry I didn't buy more of that ribbon. I'm running low. :( Anyway, that adorable face is from Peachy Keen's Cutie Pie Face Assortment. I added some brads and button twine to the layer. The sentiment is from My Pink Stamper's Family & Friends set. That set is so versatile, I just love it! The layer is just punched with some circle punches and the corners are a scalloped circle punch. I'm not sure just what look I was going for, LOL, but it worked out well enough.

I jazzed up her boots, hairbows, mittins and a few other little things with Dazzling Diamonds glitter from Stampin' Up! The base of the card is some leftover Bazzill cardstock I had and the layer is Papertrey Ink's Spring Rain. I just love how this card turned out. Thanks for looking and have a great day!

Monday, January 10, 2011

Peachy Keen's "Let's Face it Friday" Challenge


I made this card for Peachy Keen's "Let's Face It Friday" Challenge. The challenge is to create a Thank You card using a Peachy Keen face stamp. Easy enough! I used Twinkle Toes Cricut Lite cartridge for this one. I just love this little girl and her tutu! I am so pleased with her shape. It's so different than the Paper Dolls body shape, which I've gotten bored with. I searched high and low and got the last Twinkle Toes at Walmart on Saturday. I'm so excited! The dog is from Create a Critter. The background paper is DCWV Dots, Stripes and Plaids and the Thank You stamp is from My Pink Stamper Family & Friends set. I used some adhesive pearls from AC Moore for her earrings and the gems on her tutu are from Stampin' Up! For both faces, I used PK-944 Funshine Face Parts. The eyes were a little too close together for her face, so I cut them and arranged them on the acrylic block the way I wanted. It worked out just perfect! Thanks for looking and have a great day!